All Categories
Mini Wind Turbine Activity - 10/pkg - Cat# 9T-182313
In stock
SKU
9T-182313
CA$103.00
- Buy 2 for CA$95.50 each and save 7%
Quick Overview
Mini Wind Turbine Activity - 10/pkg - Cat# 9T-182313
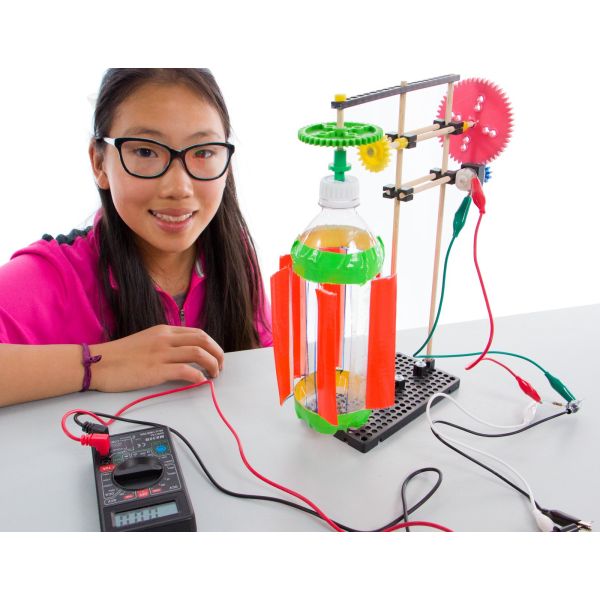
Create a turbine that will capture energy from the wind and convert it into electricity. Learn through inquiry and experimentation. Start by creating and testing an example. Then use what you learned, and lots of creativity, to turn the example wind turbine into your own unique design. It's going to be fantastic!
Found (recycling bin) materials are used to create the blades, and sometimes other parts of the turbine. Attach the blades to the included toothpicks and mount them to the turbine hub. The hub holds 1 to 6 turbine blades, and allows you to adjust their angles. Learn how the shape, number and angle of turbine blades effects electrical output of your wind turbine. You will have plenty of extra parts to try different designs.
Use a multimeter and alligator clip leads to measure the output of your wind turbine, and how different designs change the electrical output.
This activity is as much a favorite at kitchen tables as it is at elementary schools, middle schools, high schools, universities, scout troops, camps, 4-H groups, alike. It's a wonderful activity for parents, or grandparents, and teachers to work on with their kids.
What tools will you need to do this activity?
Process Description | Recommended Tool | Alternate Tool |
Cutting a wooden dowel |
| Saw, Pruning Shears, Etc. |
Tighten a screw |
| None |
| Measure output voltage |
| None |
| Connecting the multimeter to the wind turbine |
| Wire |
Make your Mini Wind Turbine even better by incorporating recycling bin material.

What's in the Mini Wind Turbine Activity?
| Component: | 10pk Quantity: | Single Quantity: |
| Dowels | 20 | 3 |
| 5/8" Screws | 10 | 1 |
| Hex Nuts | 10 | 1 |
| Hole Plates | 10 | 1 |
| Perpendicular Blocks | 20 | 2 |
| Mini Hub Assembly | 10 | 1 |
| Motors | 10 | 1 |
| Mini Motor Mounts | 10 | 1 |
| Skewer Sticks | 100 | 10 |
| Mini Hub Screws | 10 | 1 |
This is an educational product and not a toy. It is intended for use by ages 9 and above with adult supervision.


